
Securing honeycomb wrapping paper around a gift is an art that combines functionality with aesthetics. As a trusted honeycomb wrapping paper supplier, we understand the importance of ensuring your gifts are not only well - protected but also beautifully presented. In this blog post, we'll guide you through the process of securely wrapping a gift with honeycomb paper, offering tips and tricks to make your gifting experience perfect.
Why Choose Honeycomb Wrapping Paper?
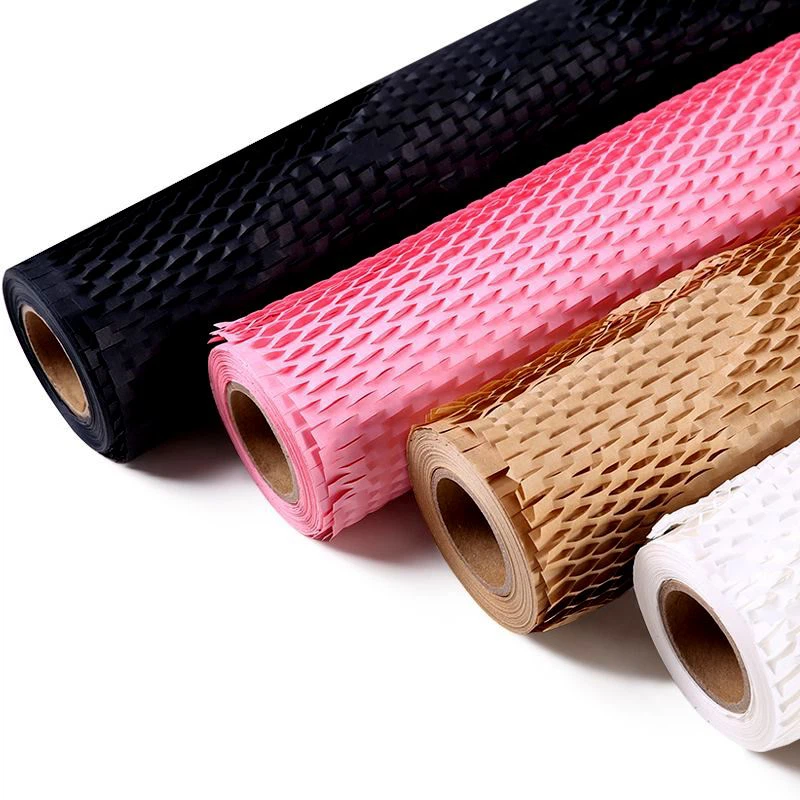
Before we dive into the wrapping process, let's explore why honeycomb wrapping paper is an excellent choice for gift wrapping. Honeycomb wrapping paper, such as Honeycomb Kraft Paper, offers superior cushioning. Its unique honeycomb structure provides a layer of protection that helps prevent the gift from getting damaged during handling or transportation.
Moreover, honeycomb wrapping paper is eco - friendly. It is often made from recycled materials and is itself recyclable, making it a sustainable option for the environmentally conscious. If you're moving and need to wrap fragile items as gifts for your new home, Honeycomb Packaging Paper for Moving is specifically designed to offer maximum protection during the moving process.
Preparing the Gift and the Wrapping Paper
The first step in securing honeycomb wrapping paper around a gift is to prepare both the gift and the paper. Start by choosing the right size of honeycomb paper. You can use Honeycomb Paper Roll, which offers flexibility in cutting the paper according to your gift's dimensions.
Measure the gift carefully. You'll need enough paper to cover all sides with a little extra for overlapping and securing the ends. Use a sharp pair of scissors or a utility knife to cut the honeycomb paper to the appropriate size. Make sure the edges are straight to ensure a neat and professional look.
Wrapping the Gift
Step 1: Place the Gift on the Paper
Lay the cut honeycomb paper flat on a clean surface. Place the gift in the center of the paper. The position of the gift is crucial as it determines how well the paper will wrap around it. You want to ensure that there is an equal amount of paper on all sides of the gift.
Step 2: Fold the Sides
Begin by folding one side of the paper over the gift. Press it gently against the gift to create a smooth surface. Then, fold the opposite side over the first fold, overlapping the edges slightly. Use your hands to smooth out any wrinkles or air bubbles. This overlapping helps to secure the paper and provides an extra layer of protection.
Step 3: Fold the Ends
Once the sides are folded, it's time to tackle the ends. Fold one end of the paper up towards the gift, creating a triangular flap. Press the flap firmly against the gift. Then, fold the other end over the first flap, again overlapping the edges. This creates a sealed end, similar to how you would seal an envelope.
Securing the Wrapping Paper
Using Tape
Tape is a simple and effective way to secure honeycomb wrapping paper. Use a strong, clear tape that won't damage the paper. Place a small piece of tape along the overlapping edges of the sides and ends. Make sure the tape is firmly attached to both layers of the paper. Avoid using too much tape, as it can make the wrapping look messy.
Using Twine or Ribbon
If you're looking for a more decorative way to secure the wrapping paper, consider using twine or ribbon. Tie a piece of twine or ribbon around the wrapped gift, making a bow or a simple knot. This not only secures the paper but also adds a touch of elegance to the gift. You can choose a color that complements the honeycomb paper or matches the occasion.
Adding Finishing Touches
Once the honeycomb wrapping paper is securely in place, you can add some finishing touches to make the gift even more special. You can attach a gift tag with a personalized message. You can also add a small ornament or a flower to the top of the gift.
Tips for Different Shaped Gifts
Round Gifts
For round gifts, such as a bottle or a ball, start by placing the gift in the center of the honeycomb paper. Then, gather the paper around the gift, like a bag. Tie a ribbon around the gathered paper to secure it. You can also fold the excess paper at the top to create a neat look.

Irregularly Shaped Gifts
Irregularly shaped gifts can be a bit more challenging to wrap. Start by identifying the largest and flattest sides of the gift. Use these sides as a base for folding the paper. You may need to make some additional cuts or folds to ensure the paper fits the shape of the gift properly.
Conclusion
Securing honeycomb wrapping paper around a gift is a straightforward process that can be mastered with a little practice. By following the steps outlined in this blog post, you can ensure that your gifts are well - wrapped and protected. As a honeycomb wrapping paper supplier, we are committed to providing you with high - quality products that meet your gifting needs.
If you're interested in purchasing our honeycomb wrapping paper for your next gifting occasion or for any other packaging requirements, we encourage you to reach out to us for procurement discussions. Our team is ready to assist you in finding the right products and solutions for your specific needs.
References
- Packaging Industry Standards and Best Practices, 2023.
- Eco - friendly Packaging Materials Research, 2022.